In Loving Memory of Simone Gauthier,
August 26th, 1915 - February 18th, 2008

Wednesday, December 10, 2008

Why?

That's all I can say.... Why?

If it was a legitimate accident, I feel sorry for the owner who loast what was a nice Civic...

If the owner was driving recklessly and cause the accident him or her self, then I say HA!!!! SUCKAH!


Thursday, November 27, 2008

walking robots, SumoBot, and other fun stuff.

So, I wanted some way to be certain that all of the parts from the radio control system stayed together and nothing got damaged or tangled etc.

I looked on the internet for any project I could find involving two servos.

The first thing I found was this walking robot on Instructables:
"http://www.instructables.com/id/A-Servo-based-4-legged-Walker/

This walker uses a micro processor to control it and therefor simply walks forward at a set pace. Since I don't have the Adruino processor, I used the radio system in it's place, hoping that I would be able to control the thing "by hand." As it turns out, it was extremely simple to control. Move one stick on the controller all the way in any direction and then rotate the stick in a counterclockwise direction around it's limits, and the thing will walk forward. Rotate the stick clockwise and it will walk in reverse.

I will add a video once I get it off the camcorder.

I played with that for a while but got quickly bored with it, and decided I wanted to investigate the continuous rotation mod for servos...

Here is a tutorial:
http://www.instructables.com/id/How-to-modify-a-servo-motor-for-continuous-rotatio/

As it turns out, modifying the two servos that I have was not as difficult. I did not have to glue any gears together and I did not have to cut the top off the pot (double click 'potentiometer' for a definition). All I had to do was sand off the 180 degree stop tab and slip a piece of plastic out of the output shaft.

Now that I had two continuous rotation servos and a complete radio control system, I simply HAD to build a crude, two-wheeled sumobot.

I will add a video once I get it off the camcorder.

It worked but I wanted to try different things so I destroyed it and started over several times. I have used several different wheels including some MASSIVE washers, wheels off a child's toy, and considered CDs.

I think the next step will be a much wider base with CDs for wheels and the entire body of the 'bot hanging beneath the 'axle', devoid of a third wheel.

I will keep you posted.

Mike from DC.

Wednesday, November 26, 2008

Turkey Day

No, not my birthday, that's the wrong turkey!

Just wanted to wish those few people who actually watch my blog:

HAVE A VERY WONDERFUL THANKSGIVING!!

Michael and Christina, from DieCastoms!

Thursday, November 13, 2008

Magum Opus has a radio!

Two things..

First, a friend referred to my project as my "Magnum Opus" the other day. It means one's "greatest achievement." I thought it sounded really cool so I think I might letter it on my truck. It will be in red fancy lettering, looking like a signature or autograph, under the window on the driver's door. "S. Christopher" will be in the same place on the passangers door, that way I will always be traveling with "Saint Christopher," the Patron Saint of Travelers at my side.

The other thing is..
I HAVE R/C NOW!

Dad brought home an old Futaba airplane transmitter and receiver, servos, battery packs, and a charger. For those of you who may know something about the equipment, here are the specs:


Transmitter (Tx)
FP-T4NBL "Attack 4"
4 Channel, 72.630MHz (channel 42)

Battery Pack (Tx)
Futaba NT-8JY
9.6VDC - 500mAh

Reciever (Rx)
Futaba FP-R114h
4 channel digital proportional, 72.630MHz

Battery Pack (Reciever)
Futaba NR-4J
4.8vdc - 500mAh

Charger
Futaba FBC-8B(4)
9.6VDC - 50mAh (Tx)
4.8VDC - 50mAh (Rx)

Servo
Futaba FP-S148

Servo
Aristo "Elite-1"
ARI-03-400


The system is currently set up for channel 42, 72.630MHz, which is for air use only and not legal to be used on land or sea vehicles. It will be fine for now for testing and whatnot but the channel WILL have to be changed before I can start making appearances with the truck. I SHOULD be able to just buy a pair of quartz crystals and plug them in to change the channel. That shouldn't cost much.

Either of the servos included will run the throttle, but neither are strong enough for much of anything else.

Wednesday, November 12, 2008

Long awaited videos of the truck engine running

Here are a few pieces of video I took about two weeks ago of the engine for the truck.

The engine is an X6 Pocket Bike engine. It is 49cc 2-stroke and is running on about an ounce of 40:1 two-stroke mixed fuel. The engine is being started with a set of "self contained jumper cables" or a "jumper pack" in some shots, and pull started in other shots.

Several times during the videos, I lift the engine off the ground and it promptly stalls.. This is because the fuel is gravity feed, thus the engine runs out of gas any time it is higher than the gas tank. In the final build, the gas tank will be mounted inside the top of the sleeper cab. This will provide the same gravity feed that was present in the motorcycle (X6 Pocket Bike) that the engine came out of originally.

In the video the exhaust port is open so you get the full sound of the 2-stroke, but with the muffler in place the engine is surprisingly muted and quiet. I have no clue if I will make any attempts at manipulating the sound or not. I was considering injecting motor oil or "smoke oil" into the exhaust to simulate a hard working diesel engine.

Hope you enjoy these videos!


By the way, the large silver item to the right of the engine is an 8:1 reduction "Constantly Variable Transmission" or CVT. It is from the pocket bike and houses the clutch. There is also another reduction between the secondary pulley and the chain sprocket output shaft. The total reduction is unknown at this time, but so is the engine's total RPM so I can't do any calculations anyway. The rear tire on the pocket bike is roughly the same diameter as the tires on the truck so I expect the same speed if nothing else is changed. For this reason, I want to add MORE reduction to the drive train to generate more pulling power and less overall speed. My target is a top speed of 15 miles per hour, and as much as it can possibly pull.

Here is another video:

OMG! SERIOUS SPONSOR!!!!!

I have just had an offer from an old friend to donate LABOR AND MATERIALS for a CUSTOM COMPLETE Fibreglass body for the truck!!!!

In exchange for his services, C will be getting his business name (of his choice) lettered on the cab doors!!!!

I will have to build the chassis and fit the engine and build a wooden form for him to glass over. He has offered to do opening doors as well. I will be doing all fitting work, but he will be making the cab itself.

This is one of the BIGGEST contributors to the truck to date!

I will write more on this post after C and I work out some more details.

Please note that those of you on the email list will NOT be notified of edits to posts, so always check the blog directly when you see that a post has been made. I have a nasty habit of posting and then editing.

THANKS C!

Mike from DC

Tuesday, November 11, 2008

SSSPROOIING!!!!

So I got this box... plain brown cardboard, not even large enough for a hard cover book... The Post Office stuck a tag over the return address so I have no clue who it is from.. Let's open it...

SSSPROOIING!!!!

I HAVE TRUCK SPRINGS!

Ok, ok, so I opened it three days ago and am just now getting around to posting. Hush.

I had no idea how stiff a 43# rate spring would be, but now that I have one, i can tell you that I can just barely compress it all the way in one bare hand. All 6 were in the box and all are identical. I may slightly redesign my suspension for their use, but they are almost perfect for my application.I think I whould have ordered them just a little longer, but I can deal with it.

Pictures to follow when I get around to taking some.

Mike from DC.

Friday, November 7, 2008

Live Help and IRC Chat rooms added to DieCastoms.BlogSpot.com!!

As a sort of experiment, I have added a Live Help!!!! function to DieCastoms. It only will work when I or my wife are logged into the system, but feel free to try it! We would love random chats from our visitors even if you aren't in need of assistance!! A permanent link to the Live Help!!!! feature can be found at the upper right of the page, below out logo.

We also have added an IRC channel to the BOTTOM of the page. This is a Java applet and has an expired security certificate. I am aware of that. I got the applet from a trustworthy friend, however, who has been using it for several years. It is safe.
For those of you who have other IRC clients that you would like to use, our room/channel is #DieCastoms and is on the server centralchat.net

We look forward to hearing more from our readers!

Thanks for visiting DieCastoms!

Mike, from DC.

Sunday, November 2, 2008

Just a quick post,

the fan in my Toshiba Portege Laptop has crapped out. I cannot run the laptop WITHOUT the fan (because my wife won't let me), so posts here may be few and far between... as if that would be anything new...

Ah well. Them's the breaks.

Mike, from DC.

Wednesday, October 29, 2008

Airtrax Omni Directional Wheels

In a simple effort to make more posts to keep people interested in my blog, I have decided to start making some tech posts too.  this post will be one of those.

I have long known what an "OmniWheel" is, having seen them on toys years ago.  An OmniWheel is a wheel and tire assembly designed in such a way as to be able to travel in any direction without stopping or changing the orientation of the wheel.


I was watching a TV show this evening called "Prototype This" in which a team of engineers attemps to build prototypes of far fetched ideas, such as Virtual Reality controlled 12 foot tall "Rock-em Sock-em Robots", and cars that can lift themselves into the ait and drive above other cars in traffic or parallel park above other cars.

It was in the latter episode that I was introduced to the "AirTrax" Omni Directional Wheel. The team goes to AirTrax and is given a demonstration of AirTrax's "SIDEWINDER ATX-3000" lift truck.


The SIDEWINDER ATX-3000 Lift Truck (fork lift) is currently the only Omni-Directional Lift truck commercially available worldwide. Click on the image to read more about the ATX-3000 Lift Truck.

Some other resources:
http://www.airtrax.com
http://www.youtube.com/watch?v=_f_x0RgVzfc

I might also suggest looking up WowWee's "Rovio," the mobile webcam.

Springs reply

OMG!

THANK YOU!!

My first Official Sponsor!

W.B. Jones Spring Co., Inc.

Springs Fast has provided all six springs for the truck and will receive in return, a 1/4 scale bumper sticker on the truck as well as the trailer, plus honorary mention on the show board for the truck!  (A show-board is similar to the 3 panel cardboard display behind your science fail project and contains before/during/after photos, credits, and special thanks type information, to be displayed with the truck at car shows, fairs, etc.)

THANK YOU very much "D." and everyone at SpringsFast and W.B. Jones!

Mike from DC.

Tuesday, October 28, 2008

Springs response

I have received a response from the spring supplier.. It seems that they may be able to provide the springs at NO CHARGE!

They have asked for pictures of the truck. Unfortunately there are no pictures as there currently is no truck :P I mentioned to the the videos that I have taken of the engine, etc. (which I will post in my next post). Hopefully the videos will be enough for the moment.

Mike, at DC

Monday, October 27, 2008

Email Posts and Newsletter

I have learned that I can email posts to the blog now without having to sign in or anything, so hopefully I will post more often. I can NOT add labels or anything from the email though, so will have to log in once in a while to sort posts.

I have also learned that posts can be emailed directly to up to 10 addresses immediately. I have 8 left. If you would like to join my "mailing list" please leave a comment on this post. If you do not want your email address listed in the post, post here anyway so I can keep track, and email me your address later.

Truck springs

I have found springs for the truck at very reasonable prices.

the specs of the spring are:
O.D. 1.47
Wire .125
Length 2.00
Rate 43 #/in
Max safe load 47.20#

this means that the outside diameter is just a little less than an inch and a half (which translates to 6 inches in diameter in full scale), the wire is one eighth of an inch thick (or half inch in full scale), The spring is 2 inches tall (or 8 inches). It will take 43 pounds to compress the spring 1 inch, and will accept a max of 47 pounds. Because of the geometry of the rear suspension, any weight on the axle will be divided between the pivot point at the front and the spring at the back, so each axle will support MORE than the springs maximum specifications without overloading the springs.

Front springs on the truck will be out of site inside the cab, but the back springs will be out in the open. Since trucks like this used leaf springs, not coil springs, I decided to slip the springs inside lengths of bicycle tire tube to hide the spring and simulate an air bladder in an air ride suspension set up.

The springs are $5.69 each, and I need six of them. I have made an offer to the supplier that I am waiting for a reply on. If the supplier will provide the 6 springs at no charge, I will advertise their company permanently and prominently on my truck. I will post the response when I receive it.

Friday, September 26, 2008

A chain of recent developments have been made concerning the RC truck.

Possibly THE most important is the simple fact that I have gotten a replacement carburetor for the engine and after bolting it in place, the engine started and ran on it's first crank and has been running properly ever since! I will post some videos soon, once I am able to take them.

Another important step has been the finding of proper axles, evidently as many as I want at VERY reasonable prices! The selection includes plain axles with a differential and sprocket as well as motorized axles from common "mobility scooters."

A co-worker of my father's has offered an RC transmitter and receiver pair as well as 4 servos for as little as $40. There may be an issue since the system is of the older AM band and may or may not work properly in the presence of electrical interference from the engine.

Sunday, August 17, 2008

My N Scale Diorama

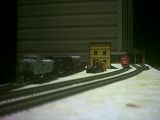
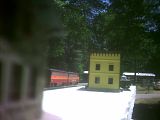
Since I loaded these three images for someone in a forum to see, I figured I might as well post them here as well.

This is the new start of my Diorama after disaster struck in the form of two cats fighting on the diorama shelf and knocking it six feet to a linoleum floor.

The diorama is built on extruded Blue foam insulation. It is roughly 6 inches by 30 inches and the foam is 2 inches thick.

Thanks goes to Gary for the buildings (which I still haven't paid him for but I DO intend to). The string of four cars with the caboose are die-cast cars from Reader's Digest but the kingpin rivets are so tight that the trucks DO NOT swivel so the cars are useless for anything but a non-powered siding in their current state.

The F7s you see are B'Mann's powered A/B pair but I believe they have cracked gears. Neither run smoothly but are good looking locos so I may clip a motor wire and leave them on a powered siding so their lights work. These are for sale, make an offer. I paid $18 for the pair, and am simply looking to cut my losses. They might be worth it to someone with a damaged shell or chassis or in need of a motor or just to someone wth enough spare parts to replace the trucks.

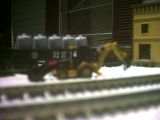
The tractor is a die-cast toy that was bought at Walgreen's Pharmacy (of all places) for $2.99. It is beautifully detailed and based on measurements specs listed on the Caterpillar website, is nearly exact scale for N. The bucket is able to raise and lower and the backhoe exhibits prototypical range of motion, being able to raise and lowers, extend and retract, and the bucket tip and dump but the arm does not swing to the sides. The outriggers are solid metal and are not adjustable. The tires feel like real rubber and roll smoothly.

The camera used to take the photos is a piece of garbage but was also free so I do not complain.

click on thumbnails for larger, clearer (not much) views:


Sunday, May 18, 2008

My first video post

Hope I did it right...

Our digital camera does not have sound, so this is unfortunately silent. It was however EXTREMELY, even PAINFULLY loud in person. We loved it!


I KNOW a few friends of mine are going to HATE me for having had the opportunity to film these next several clips:


More videos to come...
If you know me at all, you know my posts are typically few and far between so this will be the last time I apologize for taking so long to post an update...

As far as hobbies go, all are currently on hold due to lack of funds, typical I know.

I spent the day with my wife at an armed forces awareness celebration in Downtown Augusta Georgia. Don't know how long they will keep the site up but you can see flyers here: Thunder Over Augusta

I took a few pictures and LOTS of video..

Chainsaw Chicks
Chainsaw Chicks carving an eagle out of a log with a chainsaw
Chainsaw chicks

Chainsaw Chicks

Chainsaw Chics

Chainsaw Chicks

National Guard Boat
The events today were at the Augusta Riverwatch which is a scenic walking / bike path along the Savannah River... So why was the Coast Guard boat on a trailer in a parking lot just a few hundred feet from the river?

Lee Greenwood
Lee Greenwood, on stage in concert. This camera SUCKS in fading light, for one thing, and has very poor zoom quality. These were taken about 100 feet from stage.

Lee Greenwood

Lee Greenwood
Yay blurry

Lee Greenwood

king midget
This is I believe a "King Midget". An actual production vehicle that had a Briggs and Straton 5 horsepower motor from the manufacturer and was road legal. It is now at the top of a rotating signpost for a diner called the Mellow Mushroom. Dude.
king midget

king midget

chinook
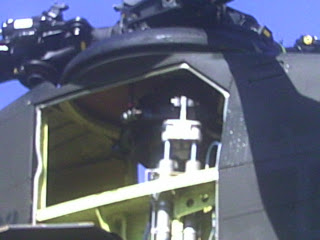
This is the front rotor hub of a Chinook Helicopter.

chinook
The rear rotor hub of the chinook

chinook
zoomed shot of rear hub

chinook
Engine on the Chinook

chinook
Toby standing beside the Chinook. These are NOT this big on TV LOL

skydiver
Somewhere in this image is a skydiver towing an American Flag. You MIGHT see two of them!

skydiver


There are more images but they will be in the next update.

Friday, February 22, 2008

AnswerTips

I've added a nifty new feature to my blog. It's called "AnswerTips". Basically you can now double click any single word in the blog and get a pop up with the definition of that word, that is of course if I spelled it correctly in the first place!!

Try it and have fun! Oh and just for the hell of it:

Pneumonoultramicroscopicsilicovolcanoconiosis

Cheers from DieCastoms

Wednesday, February 20, 2008

Tommy Two Toes

We've just discovered that one of our 4 two week old kittens has an extra toe on each front foot and therefore has become known suddenly as either Tommy Two Toes!!

Just thought you'd like to know!

Tuesday, February 19, 2008

to add a helix or not..

I had an idea early this morning about the layout but am not on the right computer to do the editing so you will have to refer to my previous post for the diagram and this description of my changes:

There is a turnout in grid G1 that will be moved to grid I2 instead, and that track will follow the current curve. A second curve will get laid inside the existing curve so that the yellow section can still have a conituous run loop. The diverging track will immediately begin a grade to place it high enough to run directly above the other mainline through the closet, so that less space in the closet will get used by tracks.. The orange layout section's track plan wont look any different aside of the fact that the continuous loop on it will become a helix instead. This will give me more room on the orange layout for a large mountain and will also give me more tunnel portal options I think. May or may not be a good idea but it's just a thought at this stage, tell me what you think of it.

I'll edit the map when I get back to my own computer.

Mike, from DC.

Sunday, February 17, 2008

Figured I would drop one more post before going to bed.. I thought I had my mind all made up and people changed it on me again.. Now I have to wonder if I should get the Digitrax Zephyr for $127 or the MRC Express for $135.. The Zephyr is all one unit but the Express has a hand held throttle..

I am still leaning more towards the Zephyr simply because it is self contained and can be extended easily but the things I would do to extend the Zephyr, the MRC system already has, at the expense of having a control system built directly into the base of the unit...

I guess we'll see what the shop has in stock and take it from there...

Have a good night, from DieCastoms...

Saturday, February 16, 2008

New Post Office and Town Hall!

Also while at the flea market today, I paid 50 cents for this perfect little building.. it is a 1990 "Galoob" toy from the "Micro Machines" line which were close to N Scale. The hospital and emergency labels may get replaced with City Hall labels since it is a bit too large of a hospital for my little town.. I think a docter with a carry bag would suffice.


$10 box of magazines, catalog of covers

While out at the local Flea Market, I spotted a nice deep stack of "Trains" magazines. The guy said $.50 each for them so I started poking through them.. then he said "Tell ya what, gimme $10 and you can take them all!" So I did!

I am trying to catalog them based on their publication date and the headlines and image on the covers. This is what I have done so far, keep checking as I go through the box and add more to the list.. The first 17 are still in their original unopened plastic however a few seem to have had the bags chewed on by something. No damage to the magazines inside that I can see.

In no particular order:

Feb '89, The Great(?) Canadian Steam Rail Excursion / Jet Powered RDC / Georgia's Weekly state-run excusrion line / IMAGE: NEW GEORGIA 6901, inset jet powered RDC

April '90, Blue Mountain and Reading Story, Chicago Skybox / Sante Fe's Chicago-Kasnsas City steel freeway / IMAGE: Sante Fe 5172

March '90, Eisenhower Funeral Train of '69 / CP's new line at Rodger's Pass / Luxury ride between Chicago and D.C. / IMAGE CP Rail 5806 exiting Macdonald Tunnel

Jan '90, Grand Canyon behind steam / VIA system gets the axe / Farewell to Oregon's last logger . Chicago & Eastern Illinois: Worthy of Recall / IMAGE: C&EI 1401

Aug '92 Amtrak tests RoadRailer mail / Railroads in the L.A. riots / Illinois Central, a railroad for the '90's / TWO photo features--Before-and-After; and an interpretive salon / IMAGE: Illinois Central 6137

Dec '91, The "Movie Engine": Sierra RailRoad No. 3 turns 100 / Dakota, Minnesota & Eastern story / All-Color photo section / Milwakee Road's phantom canadian connection / IMAGE: Sierra #3

Feb '91, Houston's Texas Limited; Conrail's Cleveland Dinosaurs / The central Vermont story / IMAGE: CV 4559

Sept '90, Tehachapi: California's bottleneck / Steam Spectacular in St Louis / rutland's short-lived Green Hornets / Beginning the WISCONSIN CENTRAL story / IMAGE: Wisc.Cent.Ltd 6523

Jan '89 New York cross Harbor: an unusual short line / New Haven, now and then / Columbia River Gorge Pictorial / IMAGE: triple headed freight crossing a lake INSERT: NH 2002

July '91, UTAH RAILROADS PHOTO SPECTACULAR / *Kalmback's rail tour of Great Britain / *Rare Lake Shore 2-8-0 survives in Maine / IMAGE: Quadruple headed freight led by SP 5393

May '91, I cannot see the cover of this mag since there is an additional insert in the bag with it. The insert says Switzerland's GLORY, Sept 5 - Sept 18, 1991 and British Rail Tour August 7 - August 22 1991

June '90, Old Colorado photos / Dining Out on the rails, a guide to dinner trains / IMAGE: an interior scene through the window of an unknown dinner train..

OCT '92, Morrison Knudsen's big gamble / Southern Pacific in the Windy City / *Dispatching on the Burlington Northern / *Bay Area steam revival / *special photo section / IMAGE: SP9757

JULY '02, Wings Return to Union Pacific Diesels / CSX Takes a Double-Whammy / RailRoading in the Prairie State, an ILLINOIS ALBUM / Great Circus Train / On Location: BNSF in Oklahoma / New York;s Cross Harbor Railroad / Selling Tickets for the Old Seaboard / IMAGE: Bloomer (?) double header lead by 91

SEPT '96, ON LOCATION: Conrail in Indiana / Short Lines & merger mainia / HORSEPOWER WARS, GM and GE battle for diesel supremacy . Museum of Treasures of St. Louis / Classic Photos by C.W. Jernstrom / IMAGE: Conrail Quality #4106

OCT '90, ANOTHER 4-8-4 BACK IN STEAM: SP&S 700 / GM's London locomotive pland marks 40 years / Aransas forester DeQueen & Eastern / operations on Wisconsin Central / IMAGE: Triple headed coal train on double main led by CN 5408

Feb '90, California's Trona Railway / INSERT: North Dakota Regional / Omaha Hot Spot Napa Valley Wine Train / IKE'S TRAINS, beginning two part coverage, the Campaign of 1952 / IMAGE: Eisenhower on Observation platform of campaign train.

This is the END of the list of mags IN PLASTIC. There are 38 more which are not in plastic that I will get to soon. Please keep checking back and if something interests you, either comment on this post or email me DieCastoms@gmail.com

Stay tuned for more, I will list each one that I have.

Mike.

Friday, February 15, 2008

Posted - February 15 2008 : 09:29:23 AM

Ok, here comes the latest installment.. Several things to discuss here..

1.) I am playing with decisions about whether to get DCC or not..
2.) I now have 3.5 more sq.ft. to play with..
3.) Many people point out that there are two reversing loops in the layout, when there are none..


To DCC or not to DCC, THAT is the question...
Ok, since I have limited funding available at the moment and am hellbent on having more than I did as a kid when I had HO track nailed and hot glued right to a 4x8 piece of living room wall paneling..
I am estimating on $300 to start out with. I have narrowed my options to two distinct lists


  • Option list 1---------------------------Option List 2

  • Zephyr DCC command system-----Faller Car System $125 each

  • Atlass DCC equiped GP38-----------undecided starter set $75*

  • 5 random used freight cars---------undecided starter set $25*
    * one starter set, around $100

  • Both lists require a 4 x 8 foot, 2 inch thick foam panel, $35

  • Both lists require quite a few pieces of Atlas Code 55 flex.


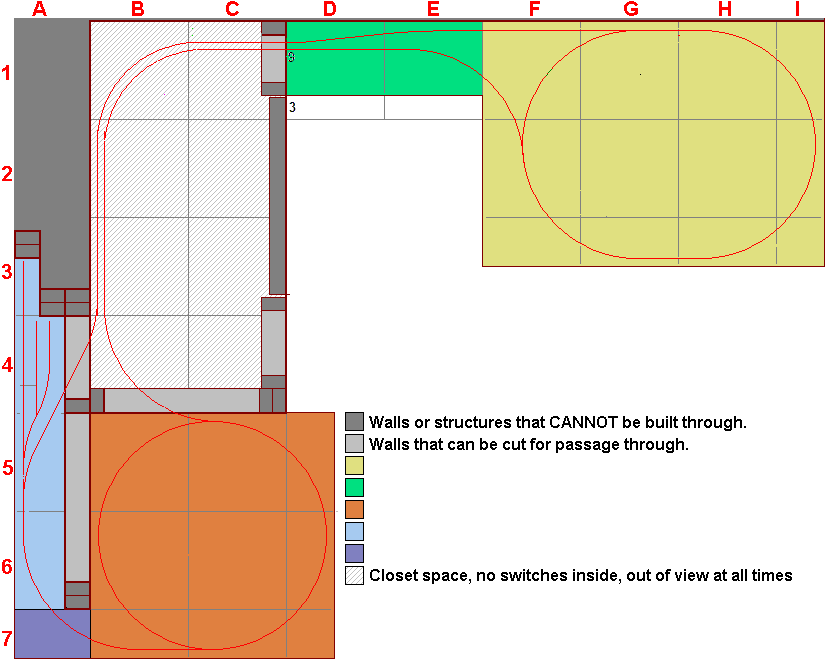
The new expansion
Basically, the Mother-In-Law and I took another look at the space and the plans I had before were smaller than I had thought. I can extend the yellow section of the layout by another foot and still not actually have to move the dining room table.
The new expansion allows space for more city roads which will eventually have real moving traffic on them! If you want to know more about the traffic idea, look for my thread in Buildings and Scenery about the "Faller Car System"! ( City street and highway traffic in small scales, http://www.scalerailsonline.com/topic.asp?TOPIC_ID=3444 )


This drawing also shows my plans for building an enclosure in the wall of the closet in which to keep my eventual Zephyr DCC command center. I chose that location specifically because the switching yard (in blue) cannot be seen from there.
Since someone asked, here is my plan for wiring.. I intend to have a feeder system from the Zephyr to each section of the layout with some common connectors. The reason is, I intend for each section to be removable and portable. The green section will be a photo diorama. The same connectors will be used between the Zephyr and the feeder system so that the Zephyr can be connected directly to any of the individual sections.
The bright blue switching yard section will be entirely independent from the rest of the layout as far as power and control is concerned. It will be a classic "Inglenook" game with a turn counter as well as consist generator of some sort and will be stocked with some short side-tip coal cars filled with different colored craft beads, and a small gasoline 4 axle switcher. It will have access to the mainline, just for the hell of it. I understand that there are certain DCC decoders that will dumb down and run on DC if there is no signal present, and I also understand that address 00 on the Zephyr can control a DC loco, so the switcher doesn't really matter what it is.

Reversing Loops
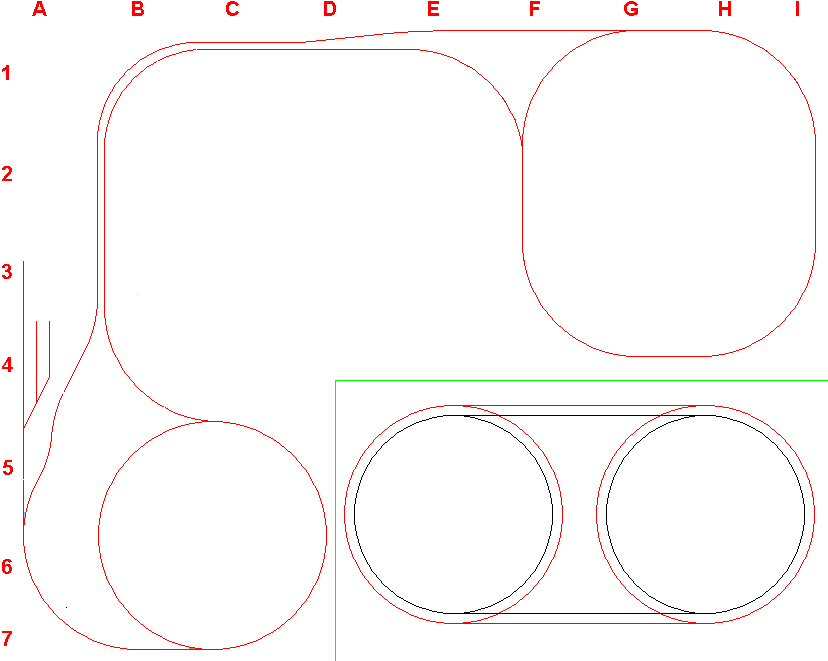
Quite a few people have pointed out that my layout plans APPEAR to have two reversing loops when in fact there are none at all. In the image below, I have deleted everything but the rails from my plan images to make it easier to see the plan without interruptions, and to the lower right I drew a very simplified version of the plan with two colours to indicate each rail. If you put your finger on any location on any of my plan images and begin moving in a clockwise rotation, there is no way possible to take a combination of turnouts and end up traveling in a counter-clockwise rotation, therefore there is no way to reverse your travel. That's the simplest and most straight forward and failsafe way that I know of to be sure of that. Here is the image:


As always feel free to save any of these images on your computer and edit them to show your suggestions and repost them here.

That's it for this edition of my post, hope you enjoyed it.
Mike, from Diecastoms

[EDITED 12:50pm 2/15 just to add a few things I forgot..]
Edited by - DieCastoms on February 15 2008 09:46:49 AM

Posted - February 13 2008 : 08:02:24 AM

(Please Note: This blog entry contains an individual post made by myself to www.scalerailsonline.com To see the post in it's original form, please use the following link: http://www.scalerailsonline.com/topic.asp?TOPIC_ID=3445 )

In a previous post, another member asked:
" so your taking up your dining room for a layout. Why don't you use one of the bedrooms?"

My response follows:

Well unfortunately all the bedrooms are being used, as bedrooms! There are 4 people living in this house. A single woman in the master suite, a married couple (my wife and myself) in bedroom 2, and another single woman in bedroom 3 and the last time anyone sat at the dining table was quite literally 3 years ago. If you were paying attention, yes, the married couple is in the smallest room in the house (by 2 inches) and yes, I am the only male in the house aside of my dog and a python..

Also, the layout is not taking up nearly as much as I expected it to take up. My mother-in-law and I were measuring yesterday and it turns out that I can add another 12 inches to the lower edge of the yellow section moving it right into row 4 and still not actually have to move the kitchen table!!

I need to do a little bit of framing so that the layout is cantilevered from the wall instead of having legs in row 4 if possible so that the table can get slid under the layout. We would somehow have more space that way than we do now!

More to come later, working on road placement at the moment.. trying really hard to think in three dimensions...

Mike.

Posted - February 12 2008 : 10:47:01 AM

(Please Note: This blog entry contains an individual post made by myself to www.scalerailsonline.com To see the post in it's original form, please use the following link: http://www.scalerailsonline.com/topic.asp?TOPIC_ID=3445 )

OK, people are still a little confused about where the layout will be in relation to the rest of the house, so here is a floor plan of the whole house.

For a size reference, the washer (W) and dryer (D) are 2 feet by 2 feet (24 pixels x 24 pixels), and the plan is to scale within 3 inches. [C] is counter space, [S] is the stove, and [F] is the refrigerator. The love seat is not scaled properly but its position in relation to the nearest corner of the orange layout section is accurate.

There is a closet indicated in bedroom two by dotted lines. This is the closet that is now in the corner of the kitchen with the two mainlines running through..

Before anyone asks, I cannot build over the washer/dryer area unless I cut holes through the water heater closet, but any tunnels through there would have to be air tight to that enclosure since the furnace blower is also in that closet. Note that I did not forget to draw in the door to that closet, there isn't one.

Here it is:


Mike, DieCastoms.

Posted - February 11 2008 : 4:07:20 PM

(Please Note: This blog entry contains an individual post made by myself to www.scalerailsonline.com To see the post in it's original form, please use the following link: http://www.scalerailsonline.com/topic.asp?TOPIC_ID=3445 )

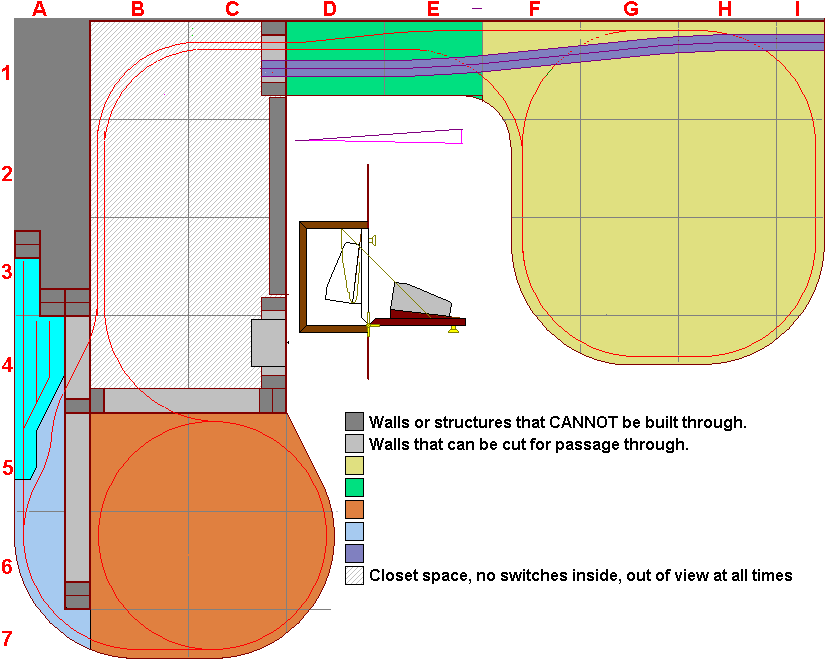
Here is the latest update on my layout.

Since people seem to be a little confused about what is layout and what is not, I have added color coding as well as indexing letters across the top and down one side..

The gray cross-hatched area from B-1 to C-4 is a closet and will not be viewable during normal operation of the layout. The different colored areas of the layout are what I refer to as my modules, and are electrically independent from each other.


The lavender section A7, the closet section B-1 to C-4, and the green section D-1 and E-1 do not have their own power sources.

The other sections, blue, salmon, and tan can all have trains running on them at the same time independently.

I will make another update when I add some terrain and try to figure out where to put my roads.

Please feel free to save a copy of the most recent image, edit it to show me what you might do differently, and repost it. I will take the ideas I like and add them as I go along.

Thanks
Mike.

Posted - February 11 2008 : 11:03:05 AM

(Please Note: This blog entry contains an individual post made by myself to www.scalerailsonline.com To see the post in it's original form, please use the following link: http://www.scalerailsonline.com/topic.asp?TOPIC_ID=3445 )


A recent update to the layout has added another 3 inches to various places, yielding larger radii in all areas. Here it is:


Later today I will start attempting to add topographic information as well as the layout for the highway, I hope..

Mike.
Edited by - DieCastoms on February 11 2008 11:05:22 AM

Posted - February 10 2008 : 12:57:10 PM

(Please Note: This blog entry contains an individual post made by myself to www.scalerailsonline.com To see the post in it's original form, please use the following link: http://www.scalerailsonline.com/topic.asp?TOPIC_ID=3445 )

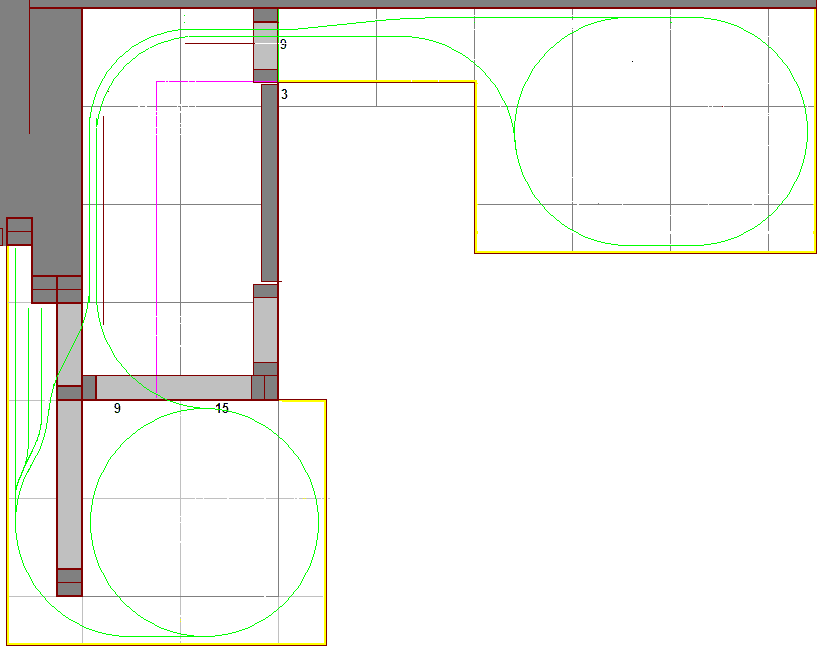
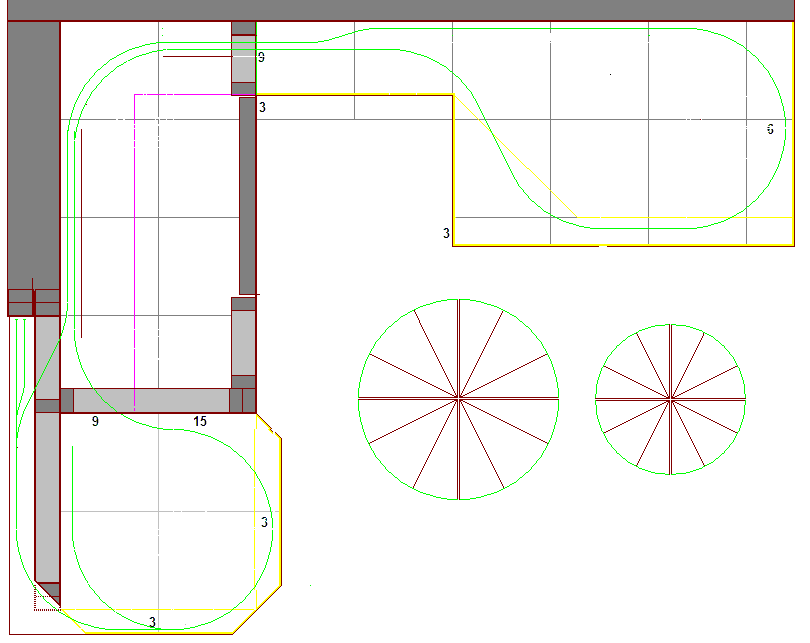
First is first, let me tell you a little about my layout. It is a total of around 17 square feet (small considering a 4 x 8 foot layout is 32 square feet) but it is not in a conventional shape.. It basically consists of 5 modules. Two independent modules (one of which is 30 x 30, the other 30 x 50) offer roundy-rounds, one 6 x 50 diorama offers an Inglenook and a passing mainline, a 9 x 25 diorama offers a double track mainline over a trestle for photo ops, and the last module is approximately 5 feet of double track mainline that is hidden from public view.

My only construction restrictions are that I cannot build much larger than the layout in the picture below, and that it must be built higher than an existing bookcase and light switch. Also, I have permission to make holes in the walls anywhere I choose.

Feel free to save this image, open it in a bitmap editor, make adjustments as you suggest, and repost the image. Note that the grid is 12 inches. Edges can be pushed out an additional 3 inches to allow for wider radii.


The layout offers itself particularly well to the idea of two distant towns connected by rail, but I want to also add details like a mountain highway tunnel to the layout and I thought it would be cool to also add some moving traffic. To see a post I am working on with lots of resources on how to make moving traffic, look in the scenery and buildings forum here at SRO.

Yes, it's been forever, I know that... Hush.

My interests have turned a bit when I realized how impractical most of my other projects were without some sort of machine shop of my own. For a short time, my interest in G Scale trains was renewed and around Christmas time I bought several cheap locos but I lost interest in that a bit as I realized how much track would cost and how insanely little security my property could offer.. I spoke to my Mother In Law about building a layout inside the house and was given a significant chunk of the kitchen and dining room. It is not as big as I would like it to be but lets face it, neither is this house!

The following posts will be exact copies of my posts on the WWW.ScaleRailsOnline.com forum. Posting here is not an effort to take anything away from SRO, just as a way to make it more accessible to friends who have no interest in model railroading themselves but are interested in following along with the progress of my layout. If you are interested in modeling in the smaller scales please check out SRO, they have alot of good resources and a bunch of good people! If you are more into the larger scales, check out www.LargeScaleCentral.com Again, a ton of good resources and a bunch for friendly folks!

Hope you enjoy reading along with me.

Mike from Diecastoms.